AI Connector
An AI Connector links the AI Agent to outside data — your system's API, a web page, or data you push yourself. Without a connector, AI only knows the static business information you fill in. With a connector, AI can answer with real-time data like order status, stock, or current pricing.
Concept
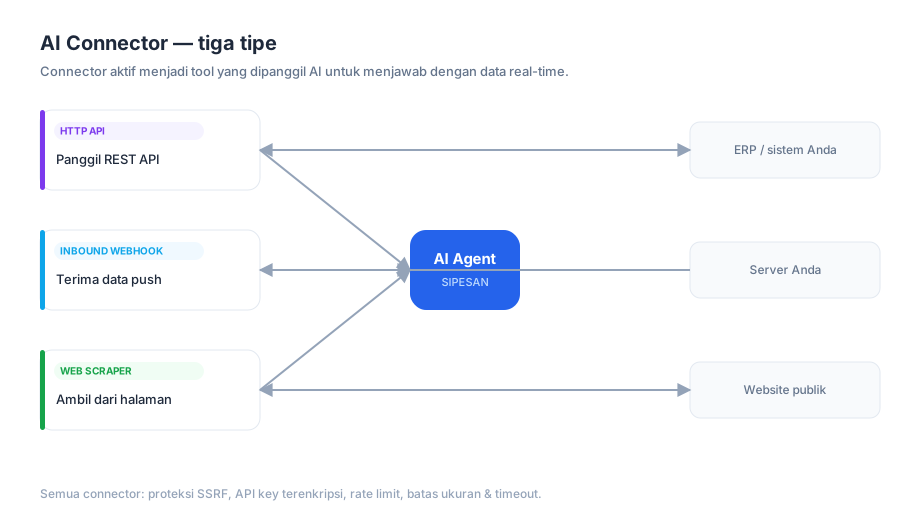
Every active connector automatically becomes a tool the AI can call. AI decides when to call it based on the description you write, sends arguments, then uses the result to compose its answer. That's why a connector's description matters — it's the AI's cue for when to use the tool.
There are three connector types.
HTTP API
Calls an external REST API (your ERP, inventory, or CRM system) and returns the result to AI.
Use case: AI answers order status straight from your ERP — a customer asks "where's my order?", AI calls the order API and replies with the latest status.
Settings:
- Endpoint URL — the API address. May contain
{param_name}placeholders filled from the AI's arguments. - HTTP Method — GET, POST, PUT, PATCH, or DELETE.
- Headers (optional) — extra headers as key–value pairs.
- API Key (optional) — stored encrypted; automatically sent as
Authorization: Bearer <key>. - Parameters — the definition of arguments the AI may send to this API.
- Response Mapping (optional) — map response fields to names AI uses, via dotted paths. Example:
price → data.items.0.priceextracts a nested value from the JSON response.
Web Scraper
Fetches a web page and extracts specific values with CSS selectors, so the AI can answer from a public catalog. For instance, pull price or availability straight from a product page on your website.
Settings:
- Target URL — the address of the page to fetch.
- CSS Selectors — pairs of result name and CSS selector. Example:
price → .product-pricestores the text of the.product-priceelement into thepricevariable. To grab an attribute rather than text, add a suffix, e.g.image → img.photo::attr(src).
For performance and courtesy to the target site, scraper results are cached for at least 30 minutes.
Inbound Webhook
Instead of AI pulling data, your system pushes data to SIPESAN, and AI reads it when answering.
Use case: your inventory system sends stock updates to SIPESAN whenever they change; AI always answers with the latest stock figure without calling an API each time.
Settings:
- Webhook Secret — a secret key for HMAC verification of incoming data. Stored encrypted.
- Data Key (optional) — a dotted path to extract a specific part of the pushed payload.
Note: the receiving push endpoint for inbound webhooks is being finalized. The connector type and its configuration are available, but accepting pushed data will be enabled in an upcoming release.
Security
All connectors are subject to the following protections:
- SSRF protection — URLs that resolve to private or loopback IPs (
127.*,10.*,192.168.*,172.16–31.*,169.254.*) are blocked, so a connector can't be used to reach your internal network. - API key encryption — API keys and webhook secrets are stored encrypted, never sent to AI nor shown in logs.
- Rate limit — calls per minute are capped (default 60) to prevent abuse.
- Size & timeout caps — overly large responses are truncated, and each call has a time limit (default 10 seconds, max 30).
How to Build
- Open the AI Connectors menu in the business panel, click Create Connector.
- Fill in the name and description — the description tells AI when to use this connector.
- Pick the type (HTTP API, Web Scraper, or Inbound Webhook); the configuration fields adapt to the type.
- Set performance: timeout, cache TTL (0 = no cache), and rate limit per minute.
- Activate the connector — only active connectors are registered as AI tools.
Using a Connector in AI Flow
Besides being called automatically by the AI Agent, a connector can be called explicitly from a flow via the fetch_data node by naming its connector_slug. See the AI Flow guide.